
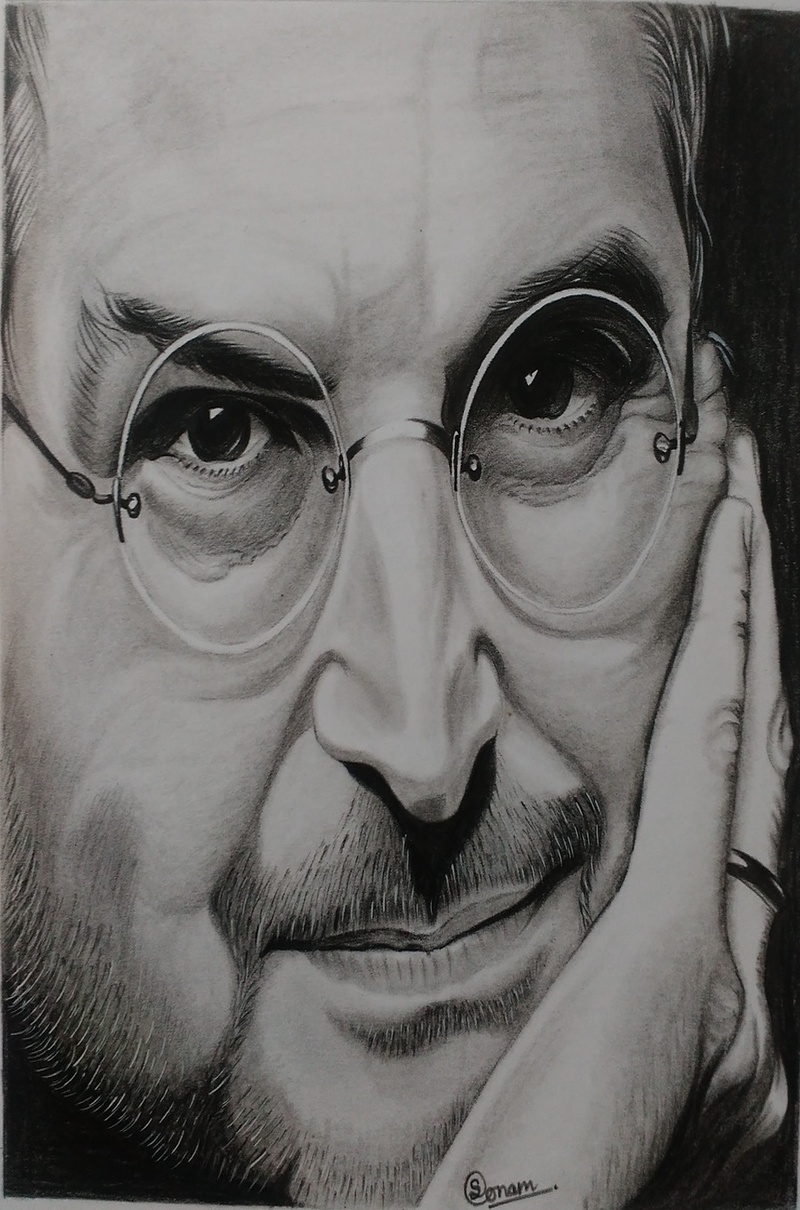
With the results being so fast and impressive, charcoal happens to be the most addictive medium for many portrait artists. Smooth and brittle, charcoal is both forgiving and challenging, especially for beginners who at times find it difficult to harness while working on their charcoal portrait. However, do not worry, below is a comprehensive tutorial to help you understand the process of building a portrait using the versatile medium of charcoal.
-
Step 1
To begin working on the initial stage of your line drawing, go for using a light grade something like a 9H or higher charcoal pencil.
Similarly like any portrait, the first and foremost thing you should do is carefully establish the position of the subject’s head on the surface and precisely plot the proportions of different features of the face. Needless to say that a conscientious observation and measurement of the placement and the relative size of eyes, nose, and mouth is crucial to depicting an accurate likeness of the subject you have chosen.
As at this stage, it is likely that you will make the most changes to the pencil sketch art, so make sure to draw the lines very lightly. It will make it easier and cleaner to erase any work you think should be improved, also keeping the image neat.
-
Step 2
Once the placement of the head and its proportions in your sketch look fine, begin outlining the features of the face in a little more detail.
As always said, careful and thorough observation is the key to achieving a good likeness in any and every kind of portrait. Here, make sure to examine for any subtle departures from the regular symmetry expected in any face. The ability to find such small variations of shape, line, tone and form will help you add a realistic touch to your charcoal portrait.
Lastly, erase any lines of construction made during the early stage of laying the image as these are likely to cause smudges later.
-
Step 3
At this stage of the drawing, you should switch to using a soft charcoal stick or maybe a crayon. This would appear dark on application but will eventually lighten as you softly smudge it over the paper surface.
Once you are finished laying the line drawing of the charcoal portrait, the next step for you is to introduce the basic tones of the subject’s face. But remember to apply the shading very lightly as it has to be built up bit by bit to the depth of tone you want to. This would require a careful approach, after you sketch a few lines with the soft charcoal, blend them into a flat tone using fingers or blending stump. Also, try to avoid any unnecessary erasing else it would significantly impact the fine quality of finish of your portrait.
-
Step 4
It’s time to pick out the major features of the face, so get hold of your sharpened charcoal pencil again. Also, get a fixative spray to protect your pencil sketch art from smudges.
Now is the time to look closely to recognize some of the darker tones and its exact location of the features of the face. The aim is to establish a few key features prominently that can be used as a foundation to build the tonal structure of the portrait’s face. Be mindful and don’t try to get there fast, as this stage would involve building up the tones and other intricate details of the face that requires a cautious gradual approach.
Once completed, apply the fixative spray on the sketch drawn to prevent smudges as you work over later.
-
Step 5
Now, using soft charcoal or a crayon to strengthen the features —their details and deepen the surrounding tones, so as to balance the overall shading.
You can begin by again looking closely at the shading done earlier by you to see what subtle variations of tone lie within each of those portions. While the larger areas of tone around the forehead, cheeks, chin, and neck should be darkened gently using the technique of graduated shading technique, the smaller details around the eyes, nose, mouth, and ears should be intensified to build up the depth.
Once you feel you have achieved the tone of the face to the depth of form as well as the sharpness of definition as you desired, lightly spray the pencil sketch artwork again with a fixative
-
Step 6
Now is the time for working on the hair of your charcoal portrait. Assemble the required tools including a soft charcoal stick or crayon, a sharpened charcoal pencil, a blending stump, an eraser (with a sharp edge), and a fixative spray.
You can start drawing the hair of the portrait using a hard charcoal pencil, slowly build up the strands and locks of hair using rhythmic lines in accordance with the style of the subject’s cut. Once you have properly established its form, spray some fixative to seal the sketch and avoid losing further detail at the next stage.
Now, it’s time to enhance the volume of the hair. You would require a soft charcoal stick and blending stump for the same, carefully smudge a layer of shading laid before for the same.
One important technique that can help add realistic details and texture to the hair is to etch soft lines of light into the hair, a slashed eraser having a sharp edge is the perfect tool to help you do so. Also, to break up any lines of light that seem too thick, you can use a sharpened charcoal pencil along with your eraser.
-
Step 7
To work on the final stage of your portrait, you will need traditional white blackboard chalk, a sharpener with a larger hole, and a blending stump. Quite hard and opaque, chalk proves to be the most dramatic element while working on a stunning charcoal portrait. It will not only help to accentuate the effect of light on the skin but also balance the overall tone of the portrait.
Remember that this is the last and the most crucial step of your drawing. You will have to meticulously build up the effect on the light on the skin but not in a one go. Firstly look closely to discern the hints of light on your subject’s face and locate their position accurately. Secondly, gently shade those marked areas with the white chalk. Lastly, soften and blend them into the surface of the skin using the blending stump.
You will notice that as you blend the chalk, the strength of its tone will gradually diminish, making you repeat the process again to bring it back up to your desired level. Doing so, you will find that some areas would be done by only a mild dusting of chalk while others need to be worked and reworked to achieve the brightness you are searching for. Once you are happy with the application of the chalk, without any delay apply the fixative to reduce the chance of any smudges.
And your portrait is ready!
