
I believe that many people have a lot of demand for screen recording in our daily work and life, for example, screen recording a live game, screen recording an online live broadcast, screen recording online training courses and so on.
Next, I will share a tool I often use for those needs, hoping to help everyone. I will introduce the RecordCast screen recorder, which allows you to record screens like OBS and edit videos only with a browser (and it’s free! ).
RecordCast introduction
The free tool RecordCast is currently an excellent screen recording software on the Internet, which is completely free. It is powerful and easy to operate. It can capture any area on the computer screen, and any application you are using, or any browser tab you are selecting. It is suitable for recording game videos, recording video lectures, etc. It must be the best helper for your screen recording.
Screen recorder
First, go to the RecordCast website: https://www.recordcast.com/. Click the “Start Recording” button to record your computer screen while click the “Try Video Editor” button to edit your recorded or existing videos. Let’s try to record first.
How do you want to record?
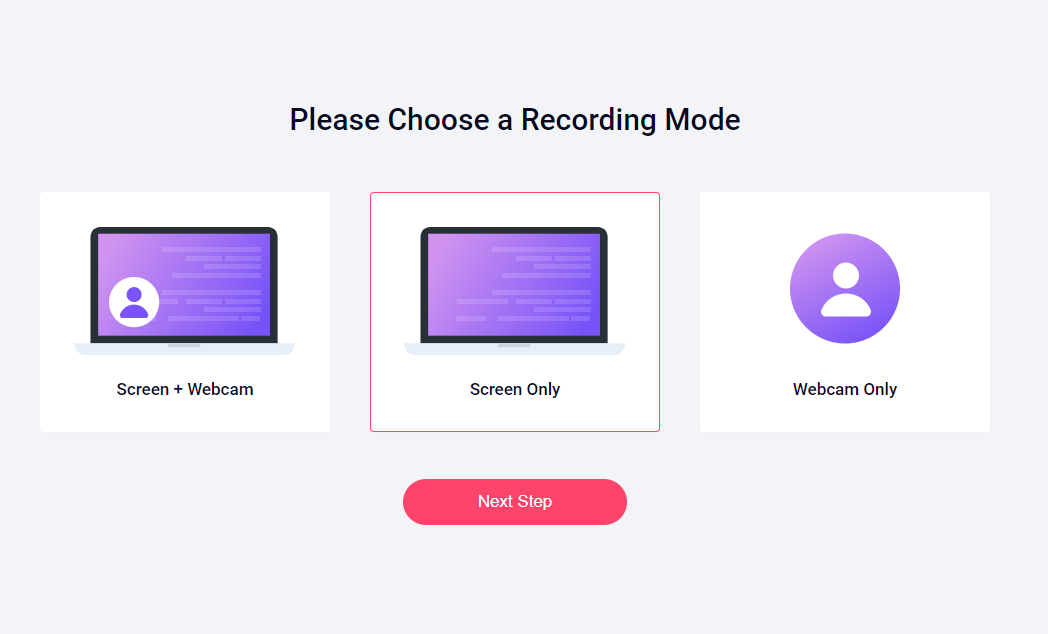
After operating started the recording tool, you should do some settings before the recording begins. Then choose how you want to record your computer screen.
- Screen + Webcam: Use screen recording and a web camera at the same time.
- Screen Only: Record screen only.
- Webcam Only: Record only from a web camera.
This time, I selected “Screen + Webcam” and click “Next Step” to proceed.
How to record audios

You can proceed with the necessary settings, such as the position of the camera and the audio to be recorded. It offers multiple options for you to record sounds in your videos.
- Microphone + System audio: Record both computer system sounds and the sounds from the microphone.
- Microphone: Record sounds only from your microphone.
- System audio: Only add computer system sounds without other sounds.
- No audio: Record video without any sounds in.
Then click “Start Recording”. A message will be displayed asking you to check “Share voice”. Check “Share audio” as displayed earlier and select the screen to record.
* If you do not check it, you will not be able to record the audio from your PC.
Where to record
It’s time to select the recording area you are going to record in your video. You can also select a browser tab in Chrome or a specific application window. You can even record the whole computer screen if you want.
After selecting, click “Share” The screen will switch, and the recording will start. You can also pause the recording or re-record from the beginning. The maximum recording time is up to 30 minutes.
Download and edit
Click the icon in the middle to end the recording. When you finish recording, you can preview the recorded video. Or click the “Download and Edit” to start the download and move to the edit screen.
Video Editor
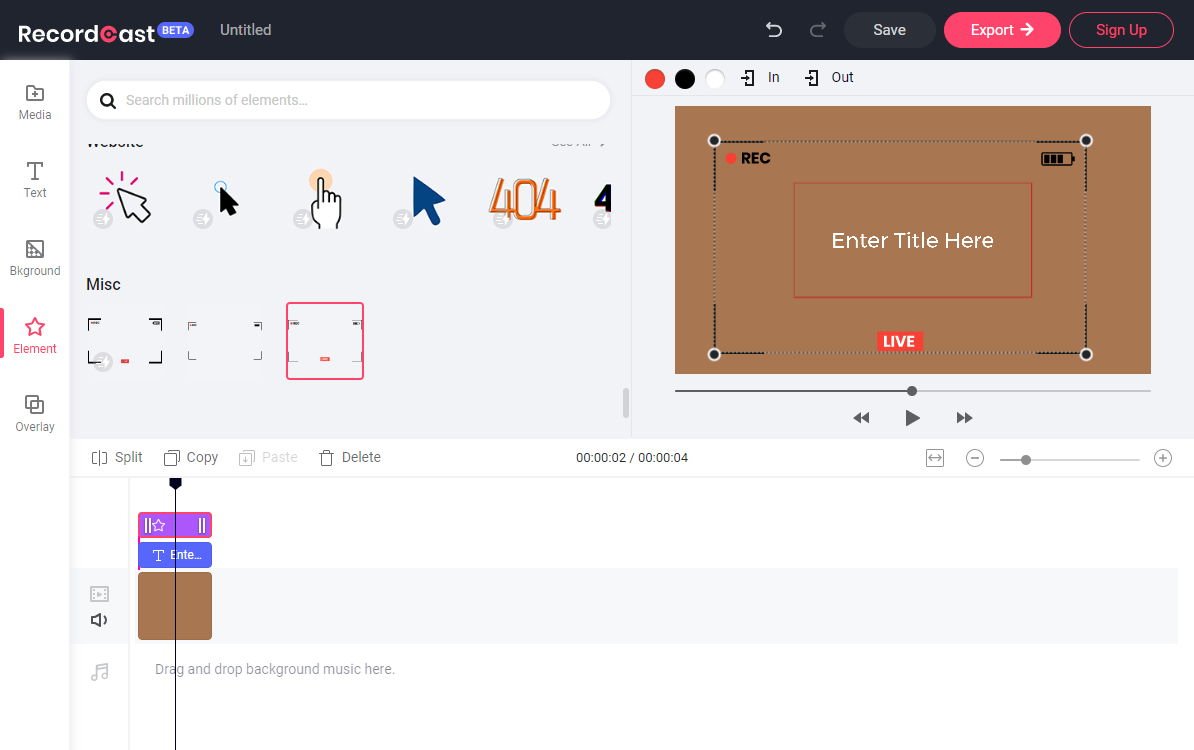
If you choose another option to proceed from “Try Video Editor”, you can proceed with editing. Otherwise, continue editing by clicking the “Download and Edit” button above because the material you recorded earlier is placed.
You can select from the list on the left in this video editor, such as text, background, switching effect, adding elements, overlays, etc. You can also change the display position of the camera later and add background music.
If you register an account, you can save the edited project so that you can make any changes next time. RecordCast allows you to sign up with your Facebook or Google account.
Summary
What did you think? By the way, the video format is MP4 after editing with Webm file. The editing function in RecordCast is still in beta, but it has many functionalities that can be found in many paid video editors. It’s free to use in a browser without downloading other programs.
