

ESP8266 is a series of ultra-low-power UART-WiFi modules developed by Shenzhen Ai-thinker Company based on Espressif’s ESP8266EX chip. As a WiFi chip, the ESP8266EX chip is no exaggeration to say that it can be used as long as it needs to use a wireless network environment.
Simply put, ESP8266 can realize data interaction through WiFi. For example: Internet of Things, smart sockets, smart homes, smart home appliances, wearable electronic products, WiFi positioning, WiFi probes, WiFi lights, etc. Mastering the use of ESP8266 can realize the real Internet of Things, only what you can’t think of, nothing you can’t do.
Of course, although there is no widespread application of smart products on the market, don’t panic, it will happen one day, and we are the cornerstone of this road.
1. What is ESP8266?
ESP8266 is a series of WIFI modules developed by Ai-thinker using Espressif’s ESP8266 chip.
2. What can ESP8266 do?
ESP8266 can realize the communication between server and client through WIFI.
1. Forward the data sent by the client to the serial port;
2. Forward the serial port data to the client.
3. AT commands to control ESP8266
Before using ESP8266, you need to burn AT firmware into ESP8266, and then use AT commands to set ESP8266 working mode and data sending and receiving.
ESP8266 has three operating mode, download mode and test mode. Before programming AT firmware, you need to connect the G0 (GPIO0) pin of ESP8266 to GND. After power off and reset, it will enter the download mode. Then use the WIFI firmware programming tool ESP_DOWNLOAD_TOOL_v2 .4.exe to burn AT firmware Ai-Thinker_.bin. After the programming is completed, disconnect the connection between G0 and GND and power off to reset, send AT\r\n to ESP8266 and reply OK, which means the programming is successful.
Fourth, how does STM32 control ESP8266
STM32 sends AT commands to ESP8266 through the serial port to achieve the purpose of controlling the work of ESP8266.
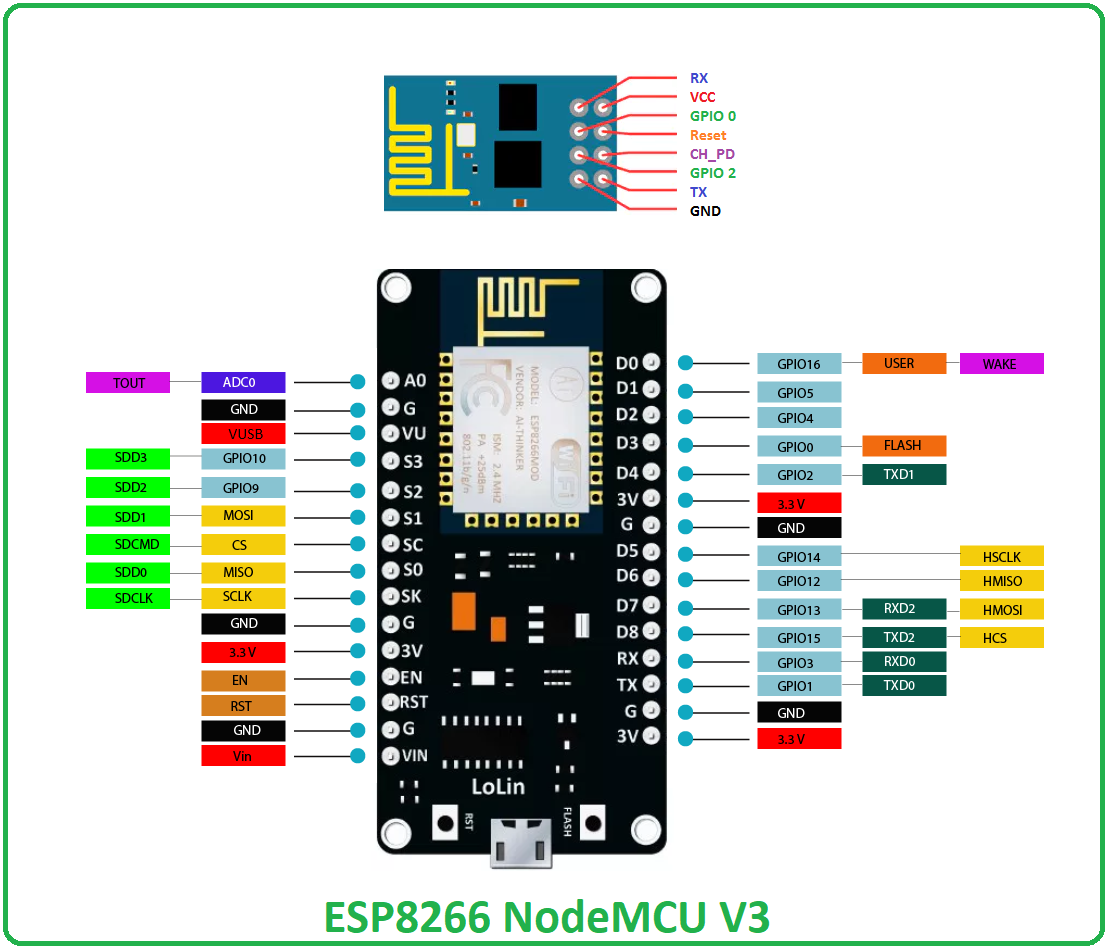
1. Correctly connect the line between STM32 and ESP8266. ESP8266 generally has 4 ports, namely VCC, GND, TX, and RX. Its VCC and GND are connected to STM32’s VCC and GND respectively. TX and RX are the serial port’s transmit and receive ports, which are connected to the STM32 serial port’s RX and TX respectively. connect.
2. Open the serial peripheral of STM32 correctly, and set the serial port baud rate to 115200. This part requires a certain foundation of STM32 development. If you don’t understand, please continue to deepen the study of the serial port part of STM32.
3. After completing the first two steps, STM32 can control ESP8266 according to AT commands.
Popular ic chip you may need:
RF2001T3D
PS11034
OZ9998HDN
MK4116N-2
