
For protection and comfort you would possibly need to take into account putting in a movement sensor transfer.
The transfer will robotically switch on the lighting fixtures every time a person walks into the garage. The splendor of the tool is that it has a time-put off feature, in order that whilst you go away the room, the lighting fixtures will flip themselves off after a preset time interval. The transfer also can be adjusted to the diploma of movement sensitivity, and there are numerous fields of view that you may purchase, for my state of affairs I bought the one hundred eighty diploma type. I additionally bought a manage that works with unmarried pole (one transfer) or 3-Way ( locations). It is a completely easy do it your self assignment that takes little or no time.
Materials List:
- Sensor transfer
- Circuit tester
- Screwdriver,
- Wire strippers
- Wire connectors
- electricians tape
Tip:
Even though that is a easy task, running with energy is risky and also you have to take all precautions. If you’re worried approximately doing the electric depletion your self, touch an authorized electrician on your area.
1. No messing round here, constantly flip off the electricity on the circuit field or fuse field. First, discover the circuit to the mild transfer that you’ll be changing and flip off the circuit breaker.
I additionally region a word at the field to inform oldsters with inside the residence to now no longer contact the field till I’m finished. occupancy sensors and vacancy sensors
By the way, I used a work light that I ran from the alternative room with a extension wire in order that I may want to see my paintings and to take photo.
2. At the transfer, get rid of the wall plate cowl and with the electricity grew to become off, get rid of the screws that preserve the vintage transfer in region.
3. Test the wires the usage of a circuit tester, simply to ensure that the transfer isn’t receiving any electricity.
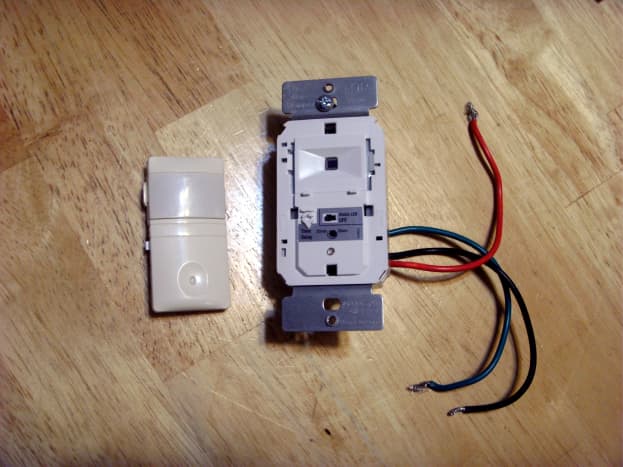
You will discover 4 wires linked to the again of the movement-sensor; a black, pink and yellow (lead) twine and a inexperienced floor twine. The black and pink twine might be used to attach the brand new movement-sensor to the wires coming from the wall outlet, however the yellow and floor will now no longer be used. (This system is for a unmarried mild transfer, for a 3 way, the yellow might be used.)
4. To get rid of the transfer, reduce the wires in the back of the vintage transfer the usage of twine cutters. Or, as in my case in an older home, I eliminated the wires with the aid of using loosening the screws the wires had been secured to. Then I needed to reduce the curved ends off the wires to make attaching the brand new wires easier.
5. After slicing the wires, strip the plastic insulation off the ends of the black and white wires the usage of the twine strippers. electrical sensors and switches
6. Twist the stop of the black twine from the movement-sensor (lead) across the black (line-Hot) twine coming from the wall and stable with a twine-connector.
7. Repeat the equal step with the pink (lead) twine from the sensor, this can connect to white twine (load). The yellow twine will now no longer connect to every other twine in a unmarried connection, ensure this twine is capped off with a twine connector or electricians tape. The inexperienced twine will even now no longer be used.
As a further precaution, wrap the connections with electric tape, to preserve the wires from pulling apart.
Tip:
Make certain you examine the manufacturer’s wiring commands at the transfer which you purchase. Most commands have a wiring diagram to follow, thank goodness!
8. Gently tuck the wires again into the transfer field as a long way in the direction of the again as feasible and function the movement-sensor into the transfer field as well.
