
This is a very simple step-by-step tutorial. It will teach you how to install lvt flooring.
I will not be explaining everything in details, but I will show you how to install lvt flooring, step by step. You must do it only if you are very sure that you want to do this. If there is any doubt, please ask us first and we’ll give you a try before buying it.
Check the Lvt Flooring Service in Dubai LVT Flooring Dubai
How to Prepare for LVT Floor Repairs
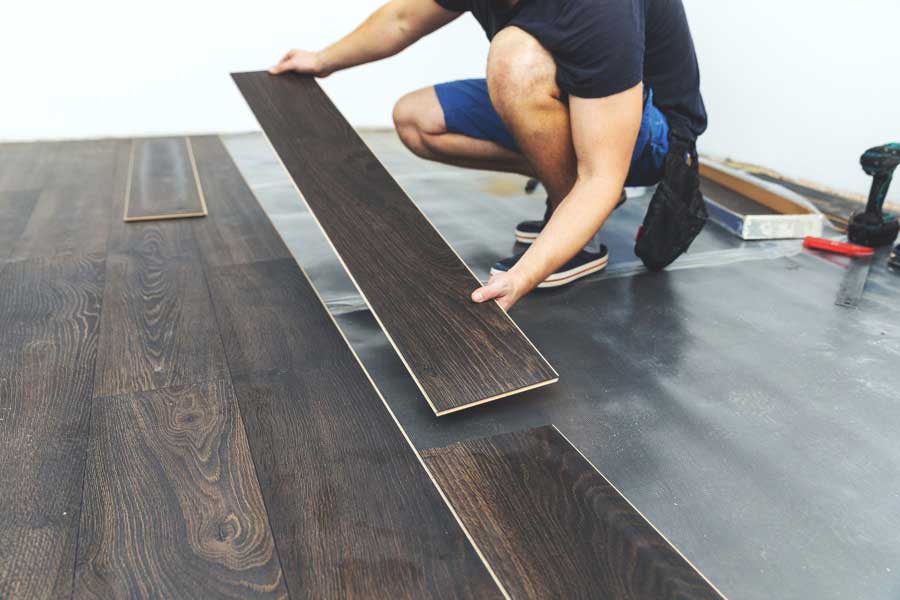
For those wondering how to do LVT flooring installation, it is a very simple process that can be done in about an hour. There are a few things you will need to have.
- Assemble the following.
- A battery powered drill with a 1/2 inch sanding bit (or a drill bit of comparable size);
- Power source for the drill;
- Optional: A 3/8 inch extension cord. It is not necessary but it may come in handy if you do not have one by yourself. Obviously, you should use the one that comes with your computer or laptop but if you don’t have one, buy one and use an extension cord instead.
- A hammer;
- An angle grinder or sander;
- Sandpaper of appropriate grit; and
Here are some basic steps to follow when installing LVT flooring
- Screw the mounting bracket to the wall studs using screws provided in the kit.
- Drill pilot holes into each stud using the drill bit supplied with your kit as well as any extra bits you might want (such as metal screws).
- For example, if your pilot hole is 0.020″ larger than your screw hole on each stud, drill 0.020″ pilot holes into four
- Place mount brackets over each stud and attach them to the bracket with metal screws provided with your kit. 4) Attach brackets over all four studs with metal screws provided with your kit except for center holes where they should have been drilled out already so that they’ll be able to accept screws after drilling out those pilot holes (if you didn’t do this step)
- of them using your bit and make sure to cut the center holes at least 2″ deep so that they’ll be able to accept screws after drilling out those pilot holes (if you didn’t do this step)
- Screw mount brackets on top of studs
- Drill mounting bolts through bracket mounts
- Install brackets on top of mount at end of each row
- Attach brackets on top of mount at end of each row
- Repeat steps 6-9 until all 4 rows are complete
- Finish drilling mounting bolts through bracket mounts
- Use drill bits supplied with your kit for finishing drilling all mounting bolts
- Secure mount brackets across row by tightening mount bolts
- Turn on drill bit
- Start drilling through wall
- Continue until finished
- Feel free to remove piece from wall
- And go
Steps to a Successful Installation of LVT Floors
LVT floors are a new type of flooring that are extremely durable, have no maintenance requirements and offer easy installation.
However, the process of installing an LVT floor can be intimidating for some home-owners who have never installed anything like it before.
The following guide will help you install an LVT floor in your home without any special skills or knowledge.
If you want to learn more about power-washable flooring, see our post: Power-Washable Flooring for Homeowners (PDF).
lvt flooring installation cost
So, you’re setting out to install flooring in a new home, and you’ve got the rough idea of what it looks like. But do you know how expensive it will be? In most cases, yes. That can be a big problem because if you don’t know how much it will cost, how much can you afford to spend?
Don’t worry; we have some answers.
First off, you need to know if the job is covered by your insurance. Many homeowners policies cover installation of any type of flooring in a new home, including carpeted surfaces. One thing that many homeowners policies don’t cover is the cost of cleaning up afterward (we won’t get into that here). Some homeowners policies explicitly exclude cleaning up after installation — so make sure to review all your options carefully before making any decisions about your new flooring option.
But even if there are no exclusions for cleanup ($0 deductible), some homeowners policies may have other provisions that limit or restrict where and when residential contractors can perform their work (commonly referred to as “no-entry zones”).
If this is the case, then simply installing the flooring will not meet your coverage obligations and therefore may not be covered under your homeowner policy.
One way to avoid this issue is to designate certain areas in your house as “No Entry Zones.”
This includes areas where contractors cannot enter without first obtaining permission from the homeowner or their representative (typically through an agent or contractor who works directly for them).
If you are unsure about how your homeowner policy treats home entry zones, refer back to our list of frequently asked questions before submitting any claims related to this topic.
If all else fails, there are residential insurance carriers who specialize in covering things such as wall projects involving special tools, such as sander belts with metal cutting blades (because they can slice through concrete).
These companies typically charge a flat rate per project rather than hourly rates and usually require contractors who work on these jobs to install a certificate from an independent third party such as The Home Depot or Lowe’s (the latter being preferred for its reliability and effectiveness but not necessarily because it’s actually cheap).
You can check with these carriers directly for details on what kind of certifications they require and pricing information (if available) before pursuing this option with them.
What’s important here: Make sure that if any contractor offers installation services under your homeowner policy.
Conclusion
Dear Readers,
I have a question for you. How to install lvt flooring?
The answer is: you don’t need to. You can install it yourself in a few minutes.
Lvt flooring is a type of floor covering that can be installed by anyone. It is not expensive and it will not take much time to install.
With the help of this article, you will learn how to install lvt flooring yourself and see how simple it is.
Also, if you know how to install other types of flooring, such as carpet or tile, then this article might also be useful to you. If that’s the case, then please feel free to use this information for that purpose. The aim of this article is not just for carpentry beginners; rather, it is for everyone who has an interest in floor covering and wants to do it himself without having any technical knowledge whatsoever.
Here’s what we should do first:
1) Find a good source for lvt flooring
2) Buy lvt flooring
3) Install
5) Remove the product from the wall
6) Repeat! (in reverse order!) Here’s how you do that:
1) Find a good source for lvt flooring: There are many different sources where you can buy lvt flooring like Home Depot or Lowes (or maybe even some specialty stores).
Because we want our readers to enjoy installing the product themselves, we recommend Lova Floor Co., which provides quality products at affordable prices and ships them directly to your door.
2) Buy lvt flooring: If buying online isn’t an option for you, then consider buying directly from manufacturers. If you prefer local stores, then there are plenty of places where people sell DIY projects; one stop shops would be Home Depot or Lowes (or maybe even some specialized stores).
3) Install: This step is pretty straightforward but it doesn’t come without its challenges too :), especially since many people don’t know what they are doing (which makes them liable for damage if they screw up). Unfortunately, installing lvt foundation isn’t as easy as just slapping some carpet over the old one! But using our guide will make sure things go smoothly and make sure your home looks great!
4) Enjoy: The best thing about installing your own products is that there’s no pressure on when you’re done! It’s completely up
