
Few household annoyances are as irritating as a leaking tap’s incessant trickle, drip, drip. A leaking tap not only wastes water and raises your expenditures, but the repetitive sound may be exhausting for even the most patient souls. Fortunately, the trade of tap repair gives a solution to this common discomfort. In this post, we will go into the area of tap repair techniques, looking at how even those with little plumbing experience may master the art of mending a leaky tap. By comprehending a few fundamental ideas and understanding the mechanics of these fittings, you’ll be well-equipped to wave goodbye to those pesky drips and retake control of your home’s plumbing.
Understanding the Fundamentals of Tap Repair
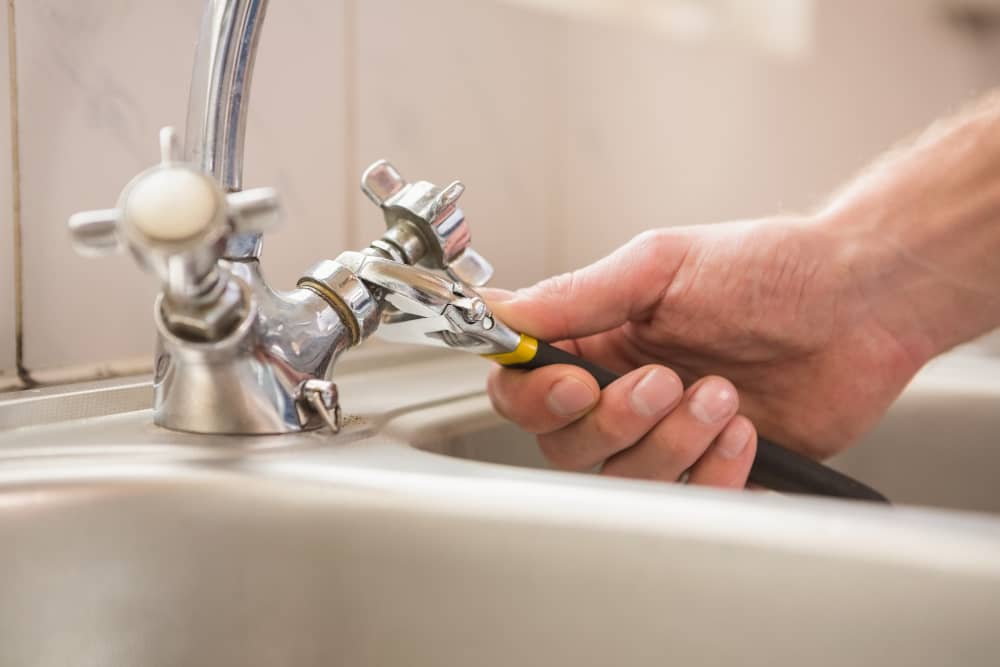
Before delving into the intricacies of tap repair procedures, it’s critical to understand the fundamental anatomy of a tap. A typical tap is made up of various parts, including the handle, stem, valve, washer, and seat. The stem, which is frequently the source of a leaking tap, is attached to the handle and regulates the flow of water. The washer at the bottom of the stem forms a watertight seal against the seat, preventing water from flowing when the tap is turned off.
The Most Common Causes of Dripping Taps
There are various frequent causes of a leaky tap. These are some examples:
- Worn-out Washer: Wear and tear on the washer might cause leaks over time. Often, a simple washer change will cure the problem.
- Loose Components: Water might leak from a loose component within the tap, such as the handle or stem. Making sure all of the pieces are correctly tightened will typically solve this problem.
- Corroded Valve Seat: Mineral deposits on the valve seat can cause a defective seal and consequent leakage. This can be resolved by cleaning or replacing the valve seat.
Techniques for Repairing Taps
Now that we’ve covered the basics of tap architecture and typical problems, let’s look at some tap repair methods that can help you stop that annoying drip:
- Gathering Required Equipment: It is critical to have the necessary equipment on hand before undertaking any tap repair. Most repairs need the use of a wrench, pliers, screwdrivers, and new washers.
- Turning Off the Water Supply: First, cut off the water supply to the tap that has to be repaired. This keeps water from leaking out while you remove the tap components.
- Dismantling the Tap: Remove the tap handle with care by releasing the screw that keeps it in place. When the handle is removed, the stem and washer are accessible.
- Washer Replacement: If the washer seems broken or worn, it is time to replace it. Remove the old washer with care and replace it with a new one of the same size. Make certain that the new washer
- Cleaning and inspecting the valve seat: Look for symptoms of rust or mineral buildup on the valve seat. Clean the seat using a gentle cloth or brush to ensure a smooth surface for the washer to seal against.
- Reassembling the Tap: Reassemble the tap components in the reverse sequence of disassembly. Tighten all parts tightly and ensure that everything is correctly aligned.
- Checking for Leaks: Reconnect the water supply and slowly open the tap. Keep an eye out for any symptoms of leaking. If the leak persists, double-check the components and ensure that everything is securely fastened.
Understanding tap repair procedures enables homeowners to confidently address a frequent household annoyance. You may say goodbye to leaky taps and their related annoyances by studying the components of a faucet, detecting frequent problems, and following step-by-step repair techniques. Remember that, while tap repair may appear difficult at first, practice and perseverance will eventually convert you into a competent DIY plumber. So, the next time you hear that annoying drip, know that you have the skills to fix it and reclaim control of your home’s plumbing.
