
To make the design look more attractive, all the crafters search for one of the common questions, i.e., how to curve text in Silhouette. Being a regular user, it can be expressed that arching the text improves the whole project. In addition, it also opens new doors of possibilities for them.
With the help of the arching text process, one can also position the text at any place and resize it. In this post, you’ll learn about primary details related to the respective process.
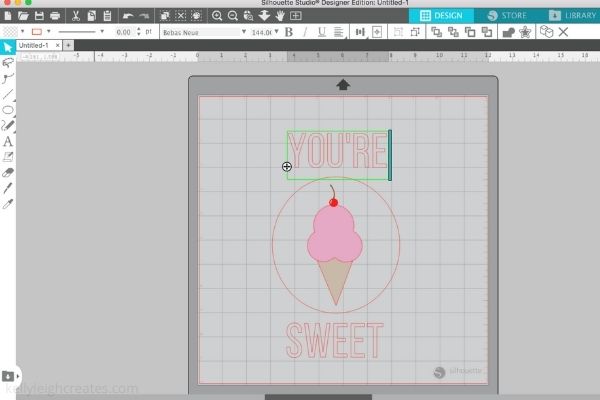
Step 1: Type Text in Text Box
- Start the process by opening the new project and clicking the A icon visible on the left side of the screen.
- Following this, enter the text by choosing the font & size from the drop-down menu available at the top.
- However, you can add two texts by creating two text boxes and giving space between them.
Step 2: Create a Path
- Followed by this, create the path for the text to get curved by selecting the drawing tool symbol given on the left side panel.
- Next, draw a perfect circle by holding on to the Shift key while clicking, dragging & resizing the circle close to the expectations.
- However, if you don’t want to use a circle shape, then opt Oval shape as an alternative.
Step 3: Curve Text Around Path
- Moreover, double-click on the text to arch the text around the shape.
- After doing this, a green box will appear near the text. Along with it, a black circle with a four-pointed arrow in the bottom-left corner of the text box.
- Choose the black circle and move the text on the circle top which you recently drew.
- Next, the text will break into a circle and curve around it.
- However, if you need some spacing between the letters, select Character Spacing, visible under the Text Style panel in the right tool menu.

Step 4: Convert Text to Path
- Furthermore, transform the text to a path by selecting the whole text and tapping the Object mentioned under the Make Compound Path menu box.
- On the other hand, you also select the Modify panel appearing on the right side of the screen.
- Inside the panel, select Make under the Compound Path. It will quickly turn the text into a path rather than individual letters.
- After that, the text editing mode will no longer be activated. Also, adjusting the individual letters and shapes will not be allowed.
- Next, the text will be converted to the path; you can delete the circle, and the text will stay curved.

- However, if you use this design as Print and Cut, open Fill Menu and select a fill color.
During the process, all the crafters are guided to go after these steps to get the hoped-for craft. Apart from that, ensure that you’ve updated the model of the Design Store before beginning the designing process.
Conclusion
Concluding the blog, it can be communicated that knowing how to curve text in Silhouette is a kid’s stuff. What’s more important is that the crafter should know exactly what the Design Store is and the process of curving the text while creating the project. You must understand each step and the images from this guide to help clear your doubts. However, if you’ve any confusion, pursue the FAQs in the section below.
Frequently Asked Questions
Question: How to Change Text Direction in Silhouette?
Answer: Go through the steps to learn about changing text direction process:
- Move your mouse and click the Blue bar available on the right side of the text selection box.
- After that, push it to the left side so characters are forced into vertical lines.
- Keep the Text box selected while clicking the Center Justify option on the Text Style panel.
- At last, your text’s direction will change as per your command.
Question: What is the use of the Warp tool in Silhouette?
Answer: The Silhouette wrap tool allows the crafter to mold and reshape objects by making freeform path adjustments. You must choose the item using the Selection tool and press Ctrl+R to use the tool. Now move the paths or edges for reshaping the Object and double-click the Wrap tool to open the dialog box.
Question: How to Slice in Silhouette Studio?
Answer: Follow the given steps to learn about slicing text in Silhouette:
- First, you’ve to activate the Knife tool available at the end of the left side panel.
- Second, press Shift while using the tool over the shape and after cutting the figure, you’ll see red lines on the border.
- Third, after having independent figures, you can separate as you want to make the project you want to create.
