
Are you a big fan of creating monograms? If so, you’ll get the complete manual based on how to make a monogram on Cricut Design Space. Let’s start from the beginning; a monogram is a design that combines the first and last letters of a name, a brand etc. However, these designs are damn popular among the youth and are available in different sizes and shapes.
With the Design Space app/program, DIYers can create custom designs/projects using various tools/features. Inside this tutorial, you will get the chance to build up your creativity skills. Are you ready to be a part of this journey? Let’s drive and make our way without wasting any time.
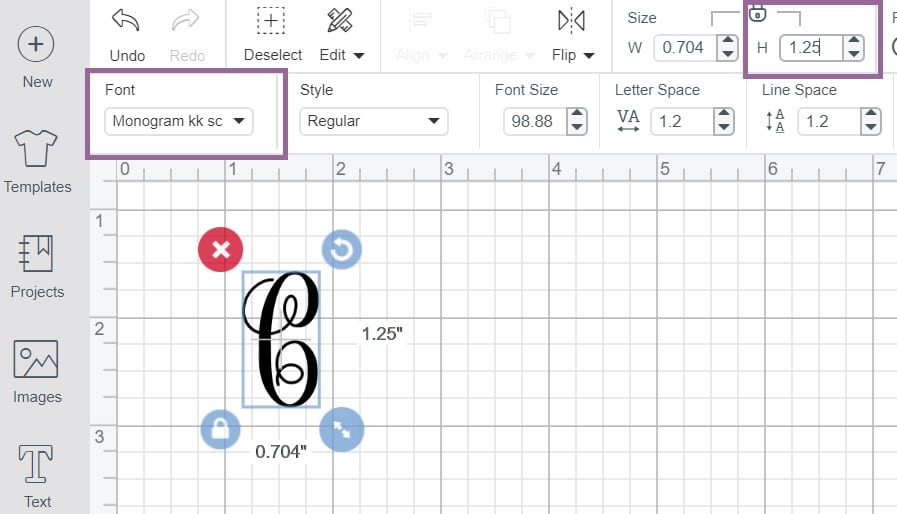
Step 1: Type a Letter & Choose Font
- Begin the process by signing in to the Cricut app and pressing the New Project box.
- Under the Design Panel, press the Text icon and note down the letter of your choice.
- Next, you can change the font & its size from the drop-down menu at the center of the screen.
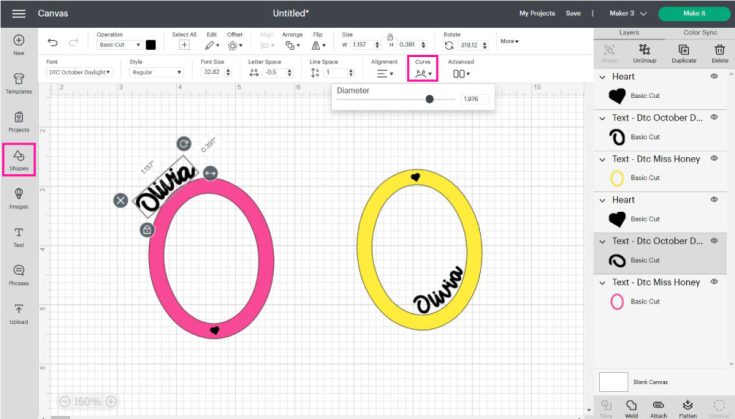
Step 2: Add Another Name
- After completing 1st step, select another font that will look good in the same place.
- Now type down the respective name and place it anywhere around the letter.
- Apart from that, you can also curve the letter depending on the name you will enter.
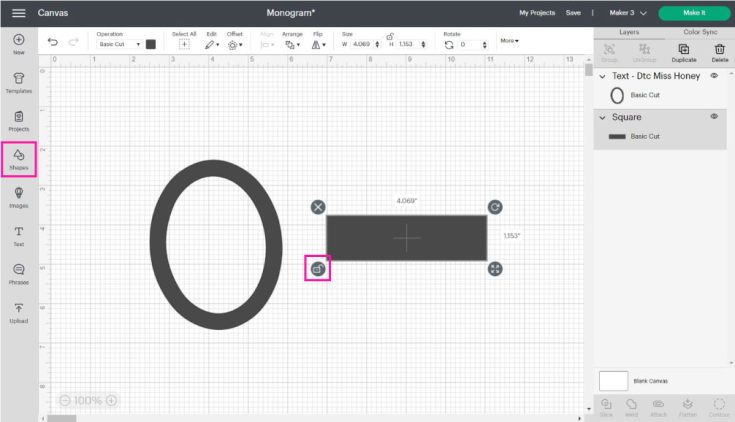
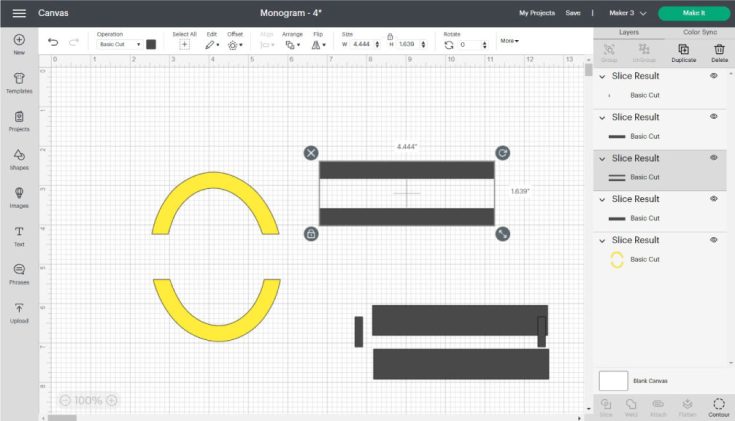
Step 3: Add Letter & Rectangle
- On the left side panel, tick Shapes and leave a square at the canvas area.
- Next, unlock the shape proportions by clicking the little lock in the lower-left corner of the part.
- Followed by this, you have to resize the rectangle to ensure that its width is larger than the letter’s width.
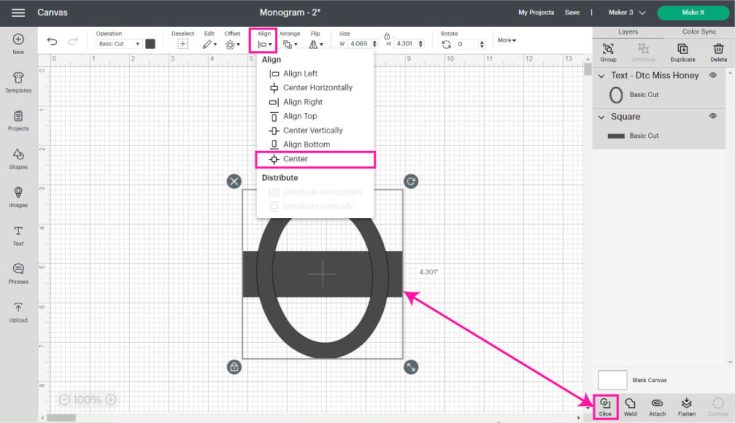
Step 4: Align & Slice
- After resizing the inserted shape, open Align Dropbox and choose the Center button. In addition, choose both layers and press the Slice box.
- Furthermore, decide on the final layer and delete the unwanted pieces from the canvas.
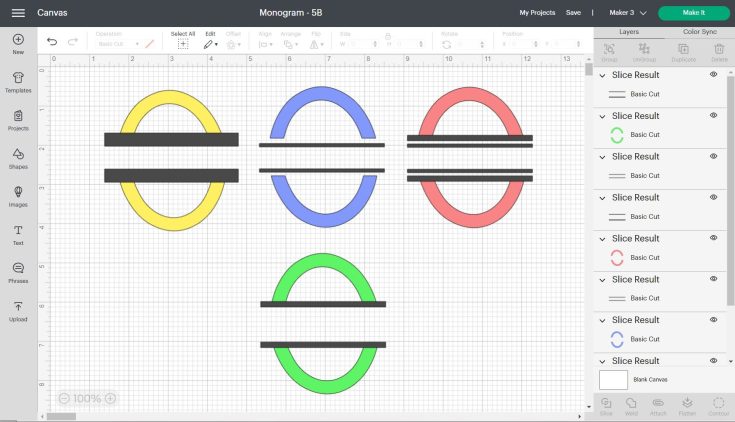
Step 5: Add Split Decoration & Weld It
- Meanwhile, attach two more rectangles to the canvas, with one thinner than the other.
- Next, you’ve chosen both the rectangles and Centre Align. Then finally, press Slice, visible on the bottom right side of the screen.
- Move all slice result pieces and keep two small rectangles on the same layer. Then remove the rest of them.
- Select the rectangle and place it on the letters by choosing both layers.
- Afterward, tap the Weld button, and you’ll have the split Monogram after a few minutes.
Step 6: Add Name or Word
- Once you are done welding the Monogram, tap the Text icon, and the text will be placed inside the Monogram.
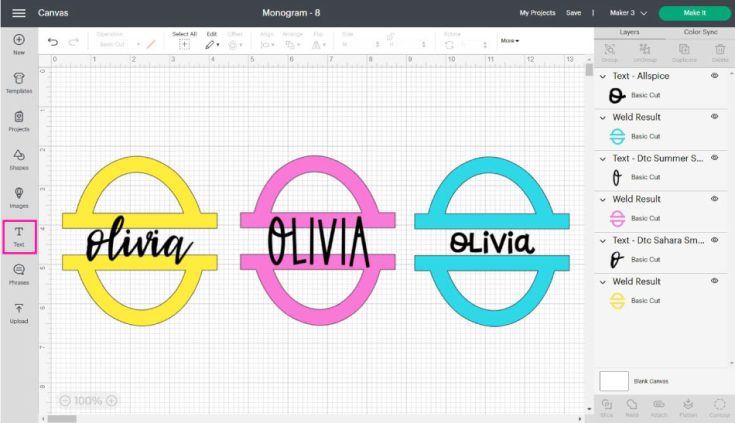
- Once you add the respective text, you can also add another frame on the split Monogram.
- Under the Layers dropbox, choose the slice type, which immediately gets added to the design.
Step 7: Save & Make It Project
- After verifying the project has been created with the earlier steps, press the Save icon.
- Once the project gets saved, choose the electric cutting machine, material type and other supplies.
- After doing so, tick the Make It and insert the mat along with the material inside the cutting mat.
- Transfer the design to the Cricut and press the start button to start the process.
- Next, you’ve to wait for a few minutes till the cutting process is in progress.
- After the process ends, unload the mat and weed out the design out of the mat.
Conclusion
As a result, it can be accepted that you find all the details connected with how to make a monogram on Cricut. However, it should be DIYer’s duty to design the custom project using all the steps explained above. In addition, the candidate should not skip any stage during the process; otherwise, they might face serious issues in future projects. Other than that, you can stay with our website. Apart from that, read the FAQs shared in the coming paragraph.
Frequently Asked Questions
Question: How to Make a Monogram Using the Design Space App?
Answer: Making custom monograms via monogram maker completes the task within half time. Have a look at the pointers below:
- Open the Cricut app and tick Monogram from the Design panel.
- Type any four initials inside the Initials boxes.
- Choose between Monogram types, and after finding the correct combination, tick the Add to Canvas.
- You can then work on the Design Space as per your wish, either by adjusting the image, color combination or line type.
Question: How to Use Monogram Fonts & Where to Find Them?
Answer: Installing personal fonts in the Design Space is a very simple task. You just have to download the file, unzip it and tick the Download option. You can transfer the file to the Cricut app while creating the project. All these fonts will help you customize the project as per your choice. However, the downloaded fonts will be available inside the System folder and can be used while creating any project.
Question: Can I Use Monogram Maker for Free?
Answer: The DIYer who doesn’t have a Cricut Access subscription can play with the Monogram Maker for 30 days (free trial). However, the one who has paid the plan amount can use the tool and its provided features for free to design the project. The user can also choose from hundreds of images, fonts and styles to create the craft.
Visit Site – cricut.com/setup
www.cricut.com/setup
cricut setup
cricut design space setup
cricut.com setup mac
cricut.com setup windows
Source :- https://cricricut.com/how-to-make-a-monogram-on-cricut-complete-manual/
