
Before swooping into a world filled with many creative ideas, it’s beyond doubt to know how do Cricut machines work. In simple language, it is a device that inspires DIYers to create amazing crafts which are beyond imagination. Other than that, this craft plotter cuts down the materials and draws different designs. The variety of tools, accessories & bundles allows the user to create the project willingly.
Besides, the creators not only produce cutting machines but also heat presses. Moreover, the cut-die machine works simultaneously with its companion app, i.e., the Design Space app or software, by accessing this software, which can create projects using the items available inside the library. Look at the sections below to learn about the craft plotter mechanism.
Step 1: Open the Cricut App and Create Your Design
- In the opening stage of the process, install Design Space, a free web app available for PCs & smartphones.
- After setting up Cricut, press the New Project/New option, and the blank Canvas will get open.
- At the page, choose Upload, available under the Menu Panel visible on the left side of the page.
- After getting connected to the new web page, choose the Upload Image box on the left.
- Afterward, select the Browse box and choose any image inside the folder.
- Once you are done uploading the image, choose the image type appearing on the right side of the web page.
- Besides, selecting the image type will directly get uploaded on the respective Canvas.
- Next, you must modify the uploaded image using various software tools to create the perfect design.
- In addition, after getting the desired look, it’s time to proceed to the next step.
- After uploading the respective design, select the Erase tool and erase the unwanted art from the design.
- Once you complete the erasing process, you need to save the edited project with the name of your choice.
- Now, upload the edited image on your Canvas and start resizing it. For that, you need to choose the correct dimensions and proportions.
- Moreover, you can change the image color by selecting the color bar on the screen’s top left.
- Apart from the color & size tool, you will see other tools on the panel. It’s your call about which tool you will use in future references.
- Furthermore, click the Attach appearing on the bottom right side of the screen.
- Now you have to choose the mat size depending on your project type.
- Moreover, press Continue for next and choose your material type or find it under the drop-box menu.
Step 2: Prepare the Cutting Machine
- After completing all the earlier-shared steps, switch on the smart cut-die machine.
- However, you must follow the instruction manual while setting it up or pairing it with a PC or smartphone.
- Once the pairing process ends, you just have to select the file, and it will immediately get shared with the craft plotter.
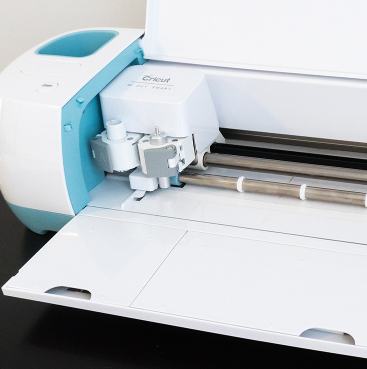
Step 3: Installing Mat & Making Your First Project
- After turning on the craft plotter, remove the mat and stick the material all over it.
- You must ensure that the mat is covered equally without any bubbles or space between the mat & material.
- Slowly take the mat’s corners and insert it inside the Cricut empty cartridges.
- The flash button will indicate that the machine is all set to get ready for the cutting process.
- After the cutting process ends, switch off the craft plotter, and the mat will automatically come out of the cartridges.
- Following the successful ending of the printing & connecting process, swiftly remove the design from the mat.
- Another thing you must remember while removing the mat is to ensure that the sheet & design shouldn’t get ruined.
- After easily pulling out the sheet, place it on the surface and use a scraper tool to adjust it evenly.
- Lastly, you will succeed by getting the desired result from the machine.
Conclusion
On the whole of the blog, everyone must know the importance of how do Cricut machines work. It will be difficult to complete the task without coming across the top-to-bottom details. However, it should be the user’s responsibility to complete the process of designing the custom project with all the steps mentioned in this blog. We hope you will find the important content and stay connected with us. However, you can also read the FAQs expressed below.
Frequently Asked Questions
Question: What are the Projects That Can Be Created Out of Cricut?
Answer: After grabbing details on how do Cricut machines work, the crafters can effortlessly create the following projects. With the help of Cricut, one can create a variety of projects. However, the limit is limited depending upon the type of machine that has been used. The names of crafts include:
- Iron-On T-Shirts.
- Custom Greeting Cards.
- Leather Earrings & Keychains.
- Paper Banners & Party Decor.
- Glass Etching Stencils.
Question: Is Using Cricut Machine Hard for DIYers?
Answer: If you are a new joiner in the crafting industry, then learning about the cutting machine might look hard. However, it becomes much easier for all of them to operate it while creating the project. Along with the machine’s supplies and accessories, creating the custom project becomes easier. The project gets completed within half time and without the waste of money.
Question: How Can I Use Cricut Design Space for Projects?
Answer: It’s very simple to use Design Space for free to create the project. You just have to follow the steps given below:
- Install the Design Space app & install it on your PCs & smartphones.
- After installing it, sign in with your Cricut ID & Password.
- At the Canvas, you’ll find a library filled with unlimited images, fonts & ready-to-use projects.
- Choose one of them and start designing the project as your preference.
