
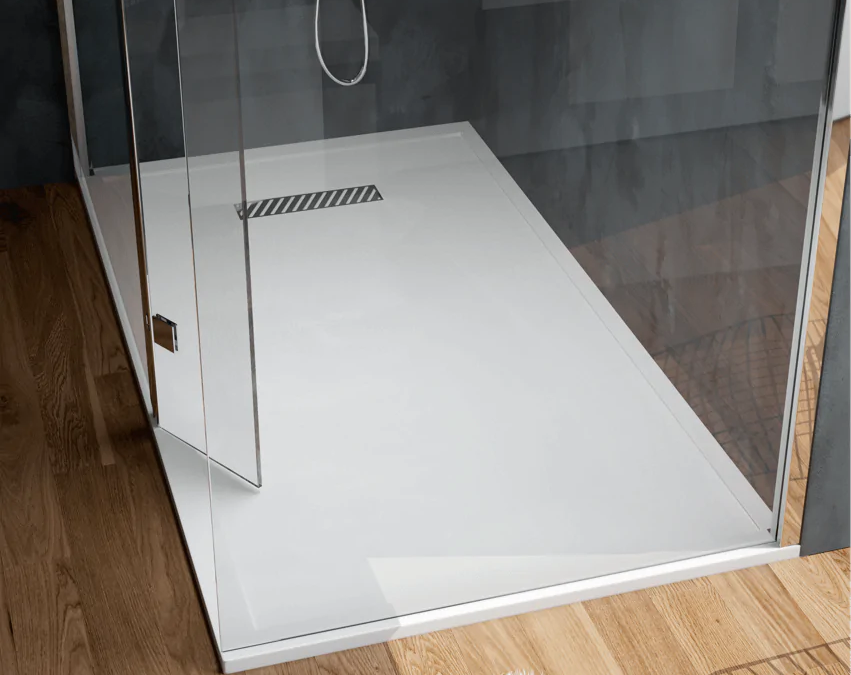
Acrylic trays are an essential component of modern bathrooms. They offer a sleek design, durability, and versatility that make them a popular choice for homeowners and builders alike. Acrylic shower tray are base components used in the construction of showers. They provide a sturdy platform for shower enclosures, preventing water from leaking onto the bathroom floor. Made from acrylic, a type of plastic, these trays are lightweight, durable, and available in various shapes and sizes to fit different shower designs.
The Benefits of Acrylic Trays
Choosing an acrylic tray offers several advantages, making it a popular option for contemporary bathrooms:
– Lightweight: Acrylic is much lighter than other materials like stone or ceramic, making it easier to handle and install.
– Durable: Despite being lightweight, acrylic trays are robust and resistant to impacts and cracks.
– Affordable: Acrylic trays are generally more cost-effective than other materials, providing good value for money.
– Easy to Clean: The smooth surface of acrylic makes it easy to clean and maintain, reducing the build-up of soap scum and grime.
– Customizable: Acrylic can be molded into various shapes and sizes, allowing for customization to fit unique shower designs.
– Warm to the Touch: Unlike some materials, acrylic is naturally warmer, enhancing the showering experience.
Installation of Acrylic Trays
The installation process for shower trays is relatively straightforward, but it’s essential to follow the manufacturer’s guidelines to ensure a watertight seal. Here’s an overview of the installation steps:
- Preparation: Ensure the shower area is clean, level, and structurally sound. Any uneven surfaces should be corrected before installation.
- Positioning: Place the tray in the desired location, ensuring it aligns with the shower enclosure and drainage system.
- Sealing: Apply a high-quality silicone sealant around the edges of the tray to prevent water leaks. Ensure all joints and seams are properly sealed.
- Connecting the Drain: Attach the drain and waste pipe, ensuring a secure connection to prevent leaks.
- Testing: Once the tray is installed, test for water tightness by running water and checking for any leaks or pooling water.
For best results, consider hiring a professional to install your acrylic tray to ensure proper fitting and sealing.
Maintenance Tips for Acrylic Trays
To keep your shower tray looking new and performing well, follow these simple maintenance tips:
– Regular Cleaning: Clean the tray regularly with a non-abrasive cleaner and a soft cloth or sponge. Avoid harsh chemicals or abrasive scrubbers, as they can damage the surface.
– Avoid Sharp Objects: Take care not to drop sharp or heavy objects on the tray, as this can cause scratches or cracks.
– Check Seals Regularly: Periodically inspect the silicone seals around the tray to ensure they remain intact and watertight.
Choose My Shower Door for Quality Trays
If you’re considering installing an acrylic in your bathroom, My Shower Door offers a wide range of high-quality options. With a reputation for craftsmanship and customer satisfaction, My Shower Door can help you find the perfect tray to suit your needs and ensure a professional installation. Contact them today to explore your options and transform your bathroom into a stylish and functional space.
