
In the world of welding, having a sturdy and reliable welding table is essential for achieving precise and high-quality welds. However, purchasing a pre-made welding table can be expensive, especially for hobbyists or those just starting out in welding tables. Fortunately, building your own welding table on a budget is entirely possible with the right materials, tools, and a bit of creativity. In this guide, we’ll walk you through the step-by-step process of building a welding table that meets your needs without breaking the bank.
Materials Needed:
Before you begin building your welding table, gather the following materials:
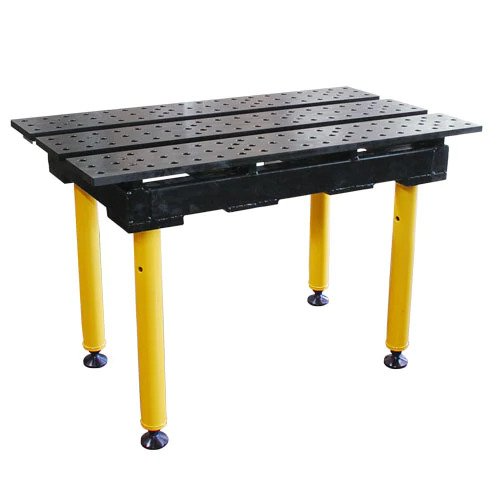
- Steel Plate or Sheet Metal: This will serve as the tabletop surface of your welding table. Opt for a thickness of at least ¼ inch to provide ample strength and durability.
- Square Tubing or Angle Iron: You’ll need this material to construct the frame and legs of the welding table. Choose a size and thickness that can support the weight of the tabletop and withstand the heat generated during welding.
- Welding Machine: A MIG welder or stick welder will be necessary for joining the metal components together securely.
- Angle Grinder: This tool will be used for cutting and shaping the metal pieces to the desired dimensions.
- Measuring Tape, Square, and Marker: These tools are essential for accurately measuring and marking the metal components before cutting and welding.
- Clamps or Vise: Clamps or a vise will help hold the welding supply store metal pieces in place during the welding process, ensuring precise and stable joints.
- Safety Gear: Don’t forget to wear appropriate safety gear, including welding gloves, a welding helmet, safety glasses, and protective clothing, to protect yourself from sparks, heat, and UV radiation.
Step 1: Design Your Welding Table
Start by sketching out a design for your welding table, taking into account the size of your workspace and the types of projects you’ll be working on. Consider factors such as tabletop dimensions, frame structure, and leg height. Keep the design simple and straightforward to minimize material waste and fabrication time.
Step 2: Prepare the Materials
Once you’ve finalized your design, it’s time to prepare the materials for construction. Use the measuring tape, square, and marker to mark and measure the steel plate or sheet metal for the tabletop and the square tubing or angle iron for the frame and legs. Use the angle grinder to cut the metal pieces to the desired dimensions, ensuring clean and precise cuts.
Step 3: Assemble the Frame
Next, assemble the frame of the welding table using the square tubing or angle iron. Use the welding machine to join the metal pieces together, ensuring that the joints are strong and secure. Pay attention to the alignment and squareness of the frame to ensure stability and uniformity. Use clamps or a vise to hold the metal pieces in place during welding, if necessary.
Step 4: Attach the Tabletop
Once the frame is complete, it’s time to attach the tabletop surface. Place the steel plate or sheet metal on top of the frame, ensuring that it is centered and flush with the edges. Use the welding machine to weld the tabletop to the frame along the perimeter, creating a strong and seamless bond. Be sure to weld both the top and bottom sides of the tabletop for added strength and stability.
Step 5: Finish and Paint
After the welding is complete, use the angle grinder to clean up any rough edges or weld beads on the welding table. Sand down any sharp corners or edges to prevent injuries during use. Once the table is smooth and free of imperfections, you can apply a coat of paint or primer to protect the metal from rust and corrosion. Choose a high-quality paint that is suitable for metal surfaces and can withstand high temperatures.
Step 6: Optional Upgrades
Depending on your budget and preferences, you can consider adding optional upgrades to your welding table, such as:
- Shelves or Storage Racks: Adding shelves or storage racks to your welding table can help keep your workspace organized and maximize efficiency.
- Clamping Mechanisms: Installing clamping mechanisms or vise grips on the tabletop surface can provide additional versatility for holding workpieces securely in place during welding.
- Wheels or Casters: If you need mobility in your workspace, you can attach wheels or casters to the legs of the welding table for easy maneuverability.
Step 7: Test and Use
Once the paint has dried and any optional upgrades have been installed, it’s time to put your DIY welding table to the test. Load it up with your welding equipment and materials, and start working on your projects with confidence. As you use your welding table, pay attention to its stability, durability, and functionality, and make any necessary adjustments or improvements as needed.
Conclusion:
Building a welding table on a budget is a rewarding project that allows you to customize your workspace to suit your specific needs and preferences. By following the steps outlined in this guide and using the right materials and tools, you can create a sturdy and reliable welding table without breaking the bank. Whether you’re a hobbyist or a professional welder, a DIY welding table is a valuable addition to any workshop.
So, roll up your sleeves, gather your materials, and get ready to build the welding table of your dreams – all without blowing your budget.
