
Steps to setup Canon IP110 printer
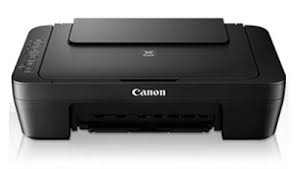
Canon is a Japanese multinational company with its headquarters located in Tokyo, Japan, with company interests in printers as well as scanners, optical imaging lenses, medical equipment as well as semiconductor production equipment. Of all these, Canon is renowned worldwide for portable wireless office printers such as the Canon Puma’s setup IP110. It’s a compact, lightweight and powerful portable printer that is perfect for students and professionals. Once you’ve installed your connection ip110 to WIFI then you’re ready to use your printer to print stunning images and professional-looking documents.
If you’ve recently purchased the latest Canon IP110 printer or trying to install it again for either Windows or Mac This document can help you set up your printer using a few easy steps. This document will help you.
- Printer initialization begins with unboxing.
- Canon Pixma driver download and installation.
- Connection of Canon IP110 to Windows.
- Connection of Canon IP110 to Mac.
If you’ve already removed your printer from its box and finished the initial setup process the next step is the next step. Let’s begin by introducing the basic.
Step 1. Canon IP110 printer setup and unboxing
- Canon IP110 printer is equipped with plenty of security precautions. The primary step involves take out all packaging tapes and materials from the printer.
- Make sure that your printer is kept in a clean area near the WiFi router, but away from any connected device.
- When you are unpacking, take your power cable, the ink cartridges, the installation kit as well as other items from the box.
- Attach the power supply to the printer and connect the other end is connected to your wall outlet.
- Install cartridges with ink and clean papers into your printer.
- Then, your Canon printer could print a test page in order to confirm the proper installation.
- Once you’re done with your initial configuration, you can download and install the Canon driver for your printer from the Canon Support page.
Step 2. Download and install the Canon IP110 Driver. Canon IP110 Driver
Installation of the driver is a vital component of the printer’s set up. It acts as an intermediary between your printer and computer and allows your Canon printer recognize the language of your computer. There are two ways you can download the driver one way is by using an installation disk. However, another method is to download the driver directly through the Canon support site.
Through the installation disk
- Remove the CD from the printer and then insert it into your computer. Then, run the configuration.
- If it does not AutoRun Then insert the CD again, and go to my computer or this computer. Then double-click MSETUP4.EXE and keep going through the steps.
Through Canon Printer Support Website
- If you don’t have the installation disc, you should visit the Canon support site.
- When you arrive at the connect canon ip110 to WIFI after landing on the installation page Your operating system will be chosen by default. You may change it as needed.
- Then click then the button to download the button and you’ll receive the printer installation file on your computer.
- Navigate to the folder for downloads on your PC. Double click on the Canon Printer Download file, and follow the steps on how to set up the printer onto your computer.
- Connect the Canon IP110 to Windows
- When setting up the Canon IP110 printer driver choose wireless for a collection method and then press on the following button.
- Select the connection for the access point, and select the next button.
- Verify that you’ve switched on your printer and that the white light is turned on; after you have checked this out you can proceed to the next.
- In the event that you’re trying to configure printing for the first time select ” Setting printer could not be located on this list” and then click on the following.
- Continue to click next on additional screens until you arrive at the page for selecting the setup procedure.
- click here to open to enable the cable for less set-up Hold your WIFI switch on the printer and release it when the light 2 flashes twice times.
- Then, press the next button until you select the location you want to be in.
- You agree to the terms of the license agreement Canon devices and remain complying with all directions to connect your Canon IP110 to a Windows computer.
- At the end of the process you are able to print a test sheet and when the installation is complete then you can click quit.
Step 4. Connect the Canon IP110 to Mac
- After you download the driver either via the CD or on the Canon help website after the initial set-up screen appears. Click next.
- Then you may be asked to enter the admin’s name as well as password. Click the Install Helper.
- Click next to wireless LAN connection, then next Access point connection next.
- Check that you’ve switched on your printer before you select the next.
- If this is your first time trying to join your printer ensure you have ( Setting printer could not be located on this list) has been selected. Then click on the following.
- Click on the Canon setup guide, then click next to click to setup your printer using a cable Hold the button for WIFI on your Printer until its power light flashes two times, then release the button, then press the next.
- If the white light remains in place in place, while when the WIFI light is blinking fast it means that the printer has made connections to the network and clicking next.
- Click Allow > Next > enter the address and go to the next screens and choose yes in the license agreement.
- Follow the instructions on screen, print one test page, then press to exit after the installation has completed.
